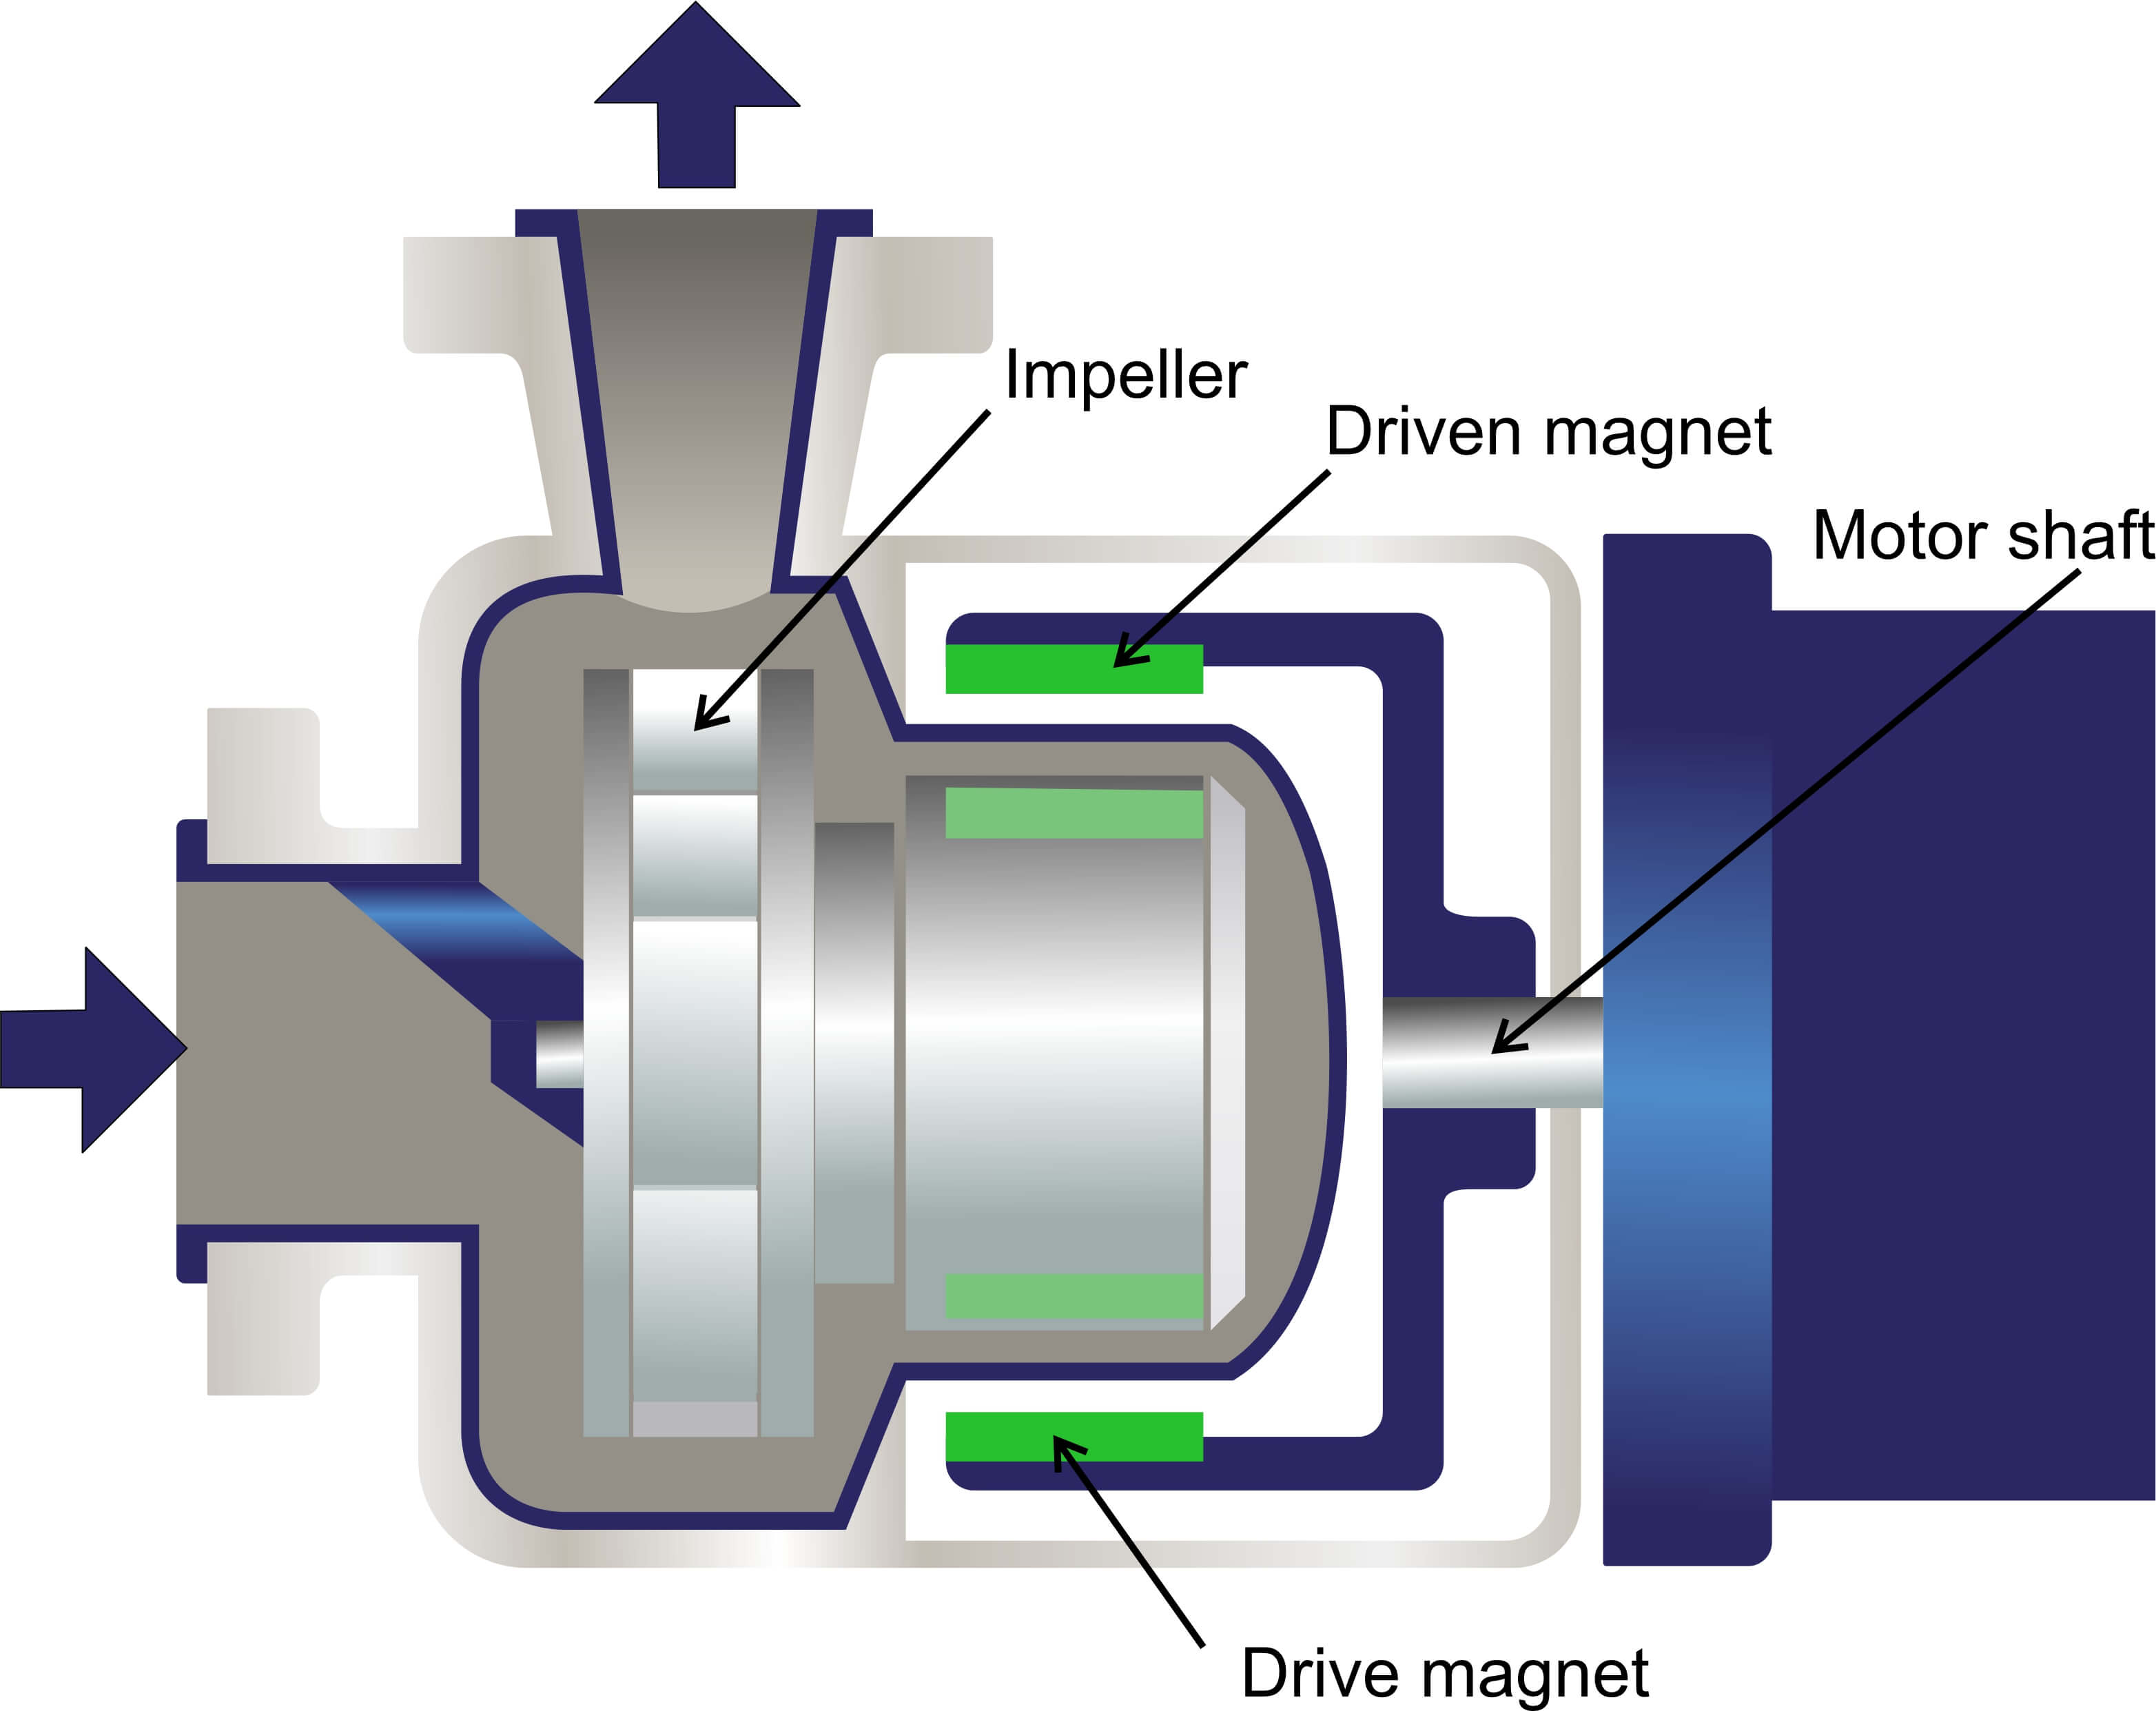
So, the other day, I decided to mess around with a magnetic circulation pump for my little home project. I’ve been wanting to improve the water circulation in my setup, and I figured this was a good way to go about it.
First things first, I gathered all the stuff I needed. I already had the pump, which I’d picked up online. I also grabbed some tubing, connectors, a power supply, and a few other bits and pieces to make sure everything would fit together nicely.
Getting Started
I started by planning out how I wanted the whole thing to look. I laid out the tubing and figured out where the pump would sit best. It’s kinda like putting together a puzzle, you know? You gotta make sure all the pieces fit before you start gluing them together.
Once I had a rough idea, I started connecting the tubing to the pump. The connectors I had were pretty straightforward – just push the tubing in, and they’d grip on tight. I made sure everything was snug and secure, because the last thing I wanted was a leak.
Powering Up
Next up was the power supply. I double-checked the voltage and amperage requirements of the pump to make sure I didn’t fry anything. Safety first, right? Then I connected the power supply to the pump, and held my breath as I plugged it in.
And… it worked! I could hear the pump humming away, and I could see the water starting to move through the tubing. It was pretty satisfying to see it all come together.
Testing and Tweaking
- I let the pump run for a while, just to make sure everything was working as it should.
- I checked for any leaks, and I was happy to see that there weren’t any.
- I also adjusted the flow rate a bit, to get it just right for my setup.
Overall, it was a pretty successful experiment. I was able to get the magnetic circulation pump up and running without too much hassle, and it’s definitely made a difference in my project. It’s always cool to see something you built yourself actually work!